
Moving a home office or PC setup is very different from tossing clothes and kitchenware into boxes. You’re dealing with fragile electronics, sensitive data, complicated cable setups, and often your main source of income. One broken monitor, lost hard drive, or missing cord can mean days of downtime, missed deadlines, or expensive replacements. With some smart planning and the right packing techniques, you can move your entire home office and PC setup safely, stay organized, and get back to work quickly in your new space.

Step 1: Audit Your Current Home Office Setup
Before unplugging anything, take a clear inventory of your home office and how it’s currently arranged. This will guide your packing, labeling, and new setup.
Create a Home Office Inventory List
List everything that’s part of your office and PC setup, including:
- Computers: Desktops, laptops, mini PCs, external drives
- Monitors: Main, secondary, vertical, ultrawide, etc.
- Peripherals: Keyboard, mouse, headset, webcam, speakers, microphone, drawing tablets, printers, scanners
- Networking gear: Router, modem, mesh Wi-Fi units, switches, ethernet cables
- Power: Surge protectors, UPS (battery backup), extension cords
- Office furniture: Desk, chair, filing cabinets, shelves, monitor arms
- Cable management: Hubs, docks, adapters, cable clips, raceways
- Paper and supplies: Files, notebooks, planners, pens, ink, etc.
Snap photos or short videos of your full setup from multiple angles. These visuals will make reassembly in your new home much easier.
Decide What to Keep, Sell, or Donate
A move is the perfect chance to downsize and upgrade. Ask yourself:
- Is this chair still comfortable and supportive?
- Do I really need three aging monitors?
- Are there outdated printers, cables, or accessories I never use?
Sell or donate anything that’s outdated, broken, or no longer needed. Less clutter means less to pack, move, and rewire later.
Step 2: Back Up and Protect Your Data
Your physical equipment can be replaced. Your data often cannot. Before you unplug a single cable, protect every important file.
Use the 3-2-1 Backup Strategy
This simple rule lowers your risk of data loss during a move:
- 3 copies of your data (1 working + 2 backups)
- 2 different types of storage (e.g., external drive + cloud)
- 1 copy off-site (e.g., a cloud backup)
Practical Backup Steps Before Moving
- Cloud backup: Sync documents and critical work files to services like Google Drive, OneDrive, Dropbox, or another preferred cloud solution.
- External drive backup: Use an external HDD/SSD to do a full backup of important folders (or entire system images if possible).
- Check restore options: Open your backup software and confirm you know how to restore files if something goes wrong.
- Encrypt sensitive data: Financial records, client info, and personal documents should be protected with strong passwords or encryption.
Keep your primary backup drive with you personally during the move instead of putting it on the moving truck.
Step 3: Take Photos and Label Your Cables
Most people underestimate how confusing cable setups can be after everything has been unplugged. A little organization now saves hours later.
Photograph Everything Before You Unplug
Use your phone to capture:
- The back of your PC or docking station (showing all connections)
- How your monitors are wired to your computer or docking hub
- Any complex audio, streaming, or multi-monitor setups
- Router and modem connections (especially if you have a mesh system)
These reference photos will be invaluable at the new location when you’re reconnecting everything.
Label Cables and Components
Use simple labels, painter’s tape, or color-coded tags:
- Label each end of a cable: “PC → Monitor 1”, “PC → Monitor 2”, “Router → Wall”.
- Group cables by device and pack them in clearly labeled bags: “Printer cables”, “Audio gear”, “Networking”.
- Consider using reusable cable ties or Velcro straps instead of tape on the cables themselves.
| What to Label | How to Label | Why It Helps |
|---|---|---|
| Monitor cables | “Left Monitor HDMI”, “Right Monitor DP” | Faster multi-monitor setup at new home |
| Power adapters | “Laptop”, “Router”, “Monitor 1” | Prevents mismatching voltages and damage |
| Network cables | “Modem → Router”, “Router → Switch” | Quickly restores internet and LAN |
| USB hubs & docks | “Dock 1: Main PC”, “Hub: Printer & Scanner” | Avoids confusion with multiple similar devices |
Step 4: Gather the Right Packing Materials
Using proper packing materials is the difference between a safe move and a pile of cracked plastic and dead screens.
Essential Packing Supplies for a PC and Home Office
- Sturdy small and medium boxes for electronics
- Original boxes for your PC, monitors, and peripherals (if available)
- Anti-static bubble wrap or anti-static bags for components
- Regular bubble wrap and packing paper for accessories
- Foam sheets or corner protectors for monitors
- Zip-top bags for screws, adapters, and small accessories
- Cable ties (Velcro preferred) for bundling cables
- Heavy-duty tape and a tape gun
- Permanent markers for clear labeling
- Moving blankets and stretch wrap for furniture
Why Smaller Boxes Are Better for Electronics
Large boxes invite overpacking, which leads to crushed or shifting items. Small and medium boxes:
- Limit weight so boxes are easier to carry
- Reduce shifting of items inside the box
- Lower risk of dropped boxes and damage
Step 5: How to Safely Pack Your Desktop PC
Your desktop or gaming PC is one of the most valuable and fragile parts of your home office. It needs extra care.
Prep the PC Before Packing
- Shut down properly and unplug from the wall.
- Disconnect all cables (label and bag them separately).
- Clean dust with compressed air so it doesn’t migrate inside during transport.
- Remove discs from any optical drives and USB devices from ports.
Protect Internal Components (Especially for Gaming PCs)
If you have a high-end GPU and large air or water-cooling, moving the PC without preparation can stress or dislodge components.
- Secure the GPU: If you’re comfortable, remove the graphics card and pack it in an anti-static bag with bubble wrap in a separate small box. Otherwise, add internal padding (foam) between the GPU and case side panel to prevent movement.
- Check heavy coolers: Large tower coolers can put stress on the motherboard if jolted. Consider supporting them with foam or removing them if traveling a long distance.
- Secure drives: Make sure HDDs/SSDs are firmly screwed in place.
Boxing the PC
Ideal: use the original PC box with factory foam inserts. If that’s not available:
- Wrap the entire case in a soft layer (foam sheet or bubble wrap).
- Place it upright in a tight-fitting box with 2–3 inches of padding on all sides.
- Fill gaps with crumpled packing paper or foam, not loose peanuts (which shift too much).
- Mark the box “FRAGILE – PC – THIS SIDE UP” on multiple sides.
Whenever possible, transport your PC upright and avoid laying it flat.
Step 6: How to Pack Monitors and Screens
Monitors are some of the most commonly damaged items in a move. Thin bezels and fragile panels require proper protection.
Remove and Protect the Stand
- Detach the stand or monitor arm according to the manufacturer’s instructions.
- Bag screws and small parts, label them “Monitor Stand – [Brand/Size]”.
- Wrap the stand/arm in bubble wrap.
Wrap the Screen Carefully
- Place a soft, non-abrasive layer (foam sheet or microfiber cloth) over the screen.
- Wrap the monitor in several layers of bubble wrap, taping only on the bubble wrap, not the monitor.
- If you have multiple monitors in one box, place a piece of cardboard or foam between each screen.
Boxing Monitors
- Use original boxes if available, as they’re designed to protect the screen.
- If using a generic box, ensure at least 2 inches of padding around all sides.
- Keep the monitor upright, never flat on its screen.
- Mark boxes clearly: “FRAGILE – MONITOR – DO NOT LAY FLAT”.
Step 7: Packing Laptops, Peripherals, and Office Gear
Laptops and smaller devices are easier to move but still need careful packing.
Laptops and Tablets
- Place each device in a protective sleeve or padded case.
- Avoid putting heavy items on top of them inside a box.
- Keep chargers in labeled bags: “Work Laptop Charger”, “Personal Laptop Charger”.
- Whenever possible, carry important laptops with you instead of loading them onto the truck.
Keyboards, Mice, and Smaller Peripherals
- Wrap mechanical keyboards or expensive mice in bubble wrap.
- Place them in a small box labeled “Desk Accessories – Fragile Items Inside”.
- Use smaller inner boxes or dividers for webcams, microphones, and webcams to avoid them bumping into each other.
Printers and Scanners
- Remove ink cartridges or toner and pack them in sealed bags to avoid leaks.
- Wrap the printer in bubble wrap and use padding inside the box to prevent movement.
- Label clearly: “This Side Up – Printer”.
Networking Equipment (Routers, Modems, Mesh Units)
- Unplug cables, label them, and take photos.
- Pack each device with its own power adapter and main cable.
- Consider grouping everything into one box labeled “Internet Setup – Open First”.
Step 8: Moving Desks, Chairs, and Office Furniture
Your furniture defines your workspace comfort and ergonomics. Handling it right prevents damage and makes setup smoother.
Disassemble Where Practical
- For large desks, remove legs if possible to make moving safer and prevent strain on joints.
- Bag screws and brackets and tape the bag to the underside of a desk piece.
- Take photos of how the desk is assembled—especially if it’s complex or uses multiple brackets.
Protect Surfaces
- Wrap desktops in moving blankets or thick padding.
- Secure padding with stretch wrap (avoid taping directly to furniture).
- Protect edges and corners with cardboard or foam edge protectors.
Office Chairs
- Adjust the chair to its lowest height.
- If the base detaches easily, remove it and wrap separately.
- Cover the chair in a moving blanket or stretch wrap to protect upholstery and arms.
Step 9: Labeling and Organizing for a Fast Re-Setup
How you label and group boxes will determine how quickly you can get your office back up and running after the move.
Use a Clear Labeling System
On each box, write:
- Room: “Home Office”
- Category: “PC & Monitors”, “Networking”, “Paper Files”, “Desk Drawer 1 – Stationery”
- Priority: “Open First”, “Open Last”
Create an “Open First” Office Box
This box should include the essentials you need to function on day one:
- Laptop or primary work device (if not carried with you)
- Power strip and extension cord
- Router and modem (plus essential ethernet cables)
- A basic set of cables (HDMI, USB, charging cables)
- Notepad, pens, and any necessary documents for immediate work
- A small toolkit (screwdriver, scissors, tape, cable ties)
Mark this box very clearly: “HOME OFFICE – OPEN FIRST” and keep it accessible.
Step 10: Decide What Travels With You vs. With Movers
Some items are safer in your own vehicle, especially if they’re valuable or critical to your work.
Items to Keep With You if Possible
- Laptops and tablets
- Main backup drives with sensitive data
- Important documents and physical files (contracts, tax records, legal documents)
- Small, high-value electronics (cameras, microphones, specialty peripherals)
Items That Movers Can Safely Transport
- Desktop PC and monitors (if well packed)
- Printers, scanners, and larger peripherals
- Desks, chairs, filing cabinets, and shelving
- Boxes of general supplies and accessories
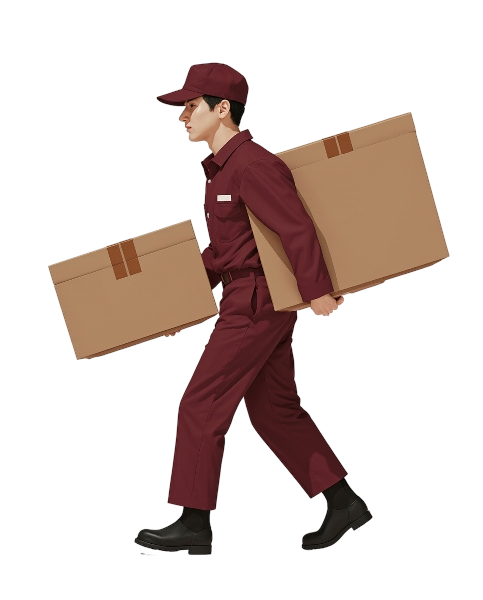
Using a professional moving team can drastically reduce the risk of damage, especially for heavy furniture and larger electronic setups. If you want experienced help with your home office move, consider working with a trusted mover like United Local Movers for careful packing, transport, and setup support.
Step 11: Moving Day: Loading, Transport, and Unloading
Even well-packed gear can be damaged by rough handling. A few smart choices on moving day go a long way.
Loading Tips
- Keep office boxes together: Load all “Home Office” boxes in the same area of the truck.
- Protect electronics: Stack electronics on top of heavier boxes, never underneath.
- Mind the orientation: Follow the “This Side Up” instructions on PC and monitor boxes.
- Secure items: Use straps or tie-downs to prevent boxes from sliding during transport.
Transport Considerations
- Avoid exposing electronics to extreme heat or cold for prolonged periods.
- Don’t leave computers and monitors in a car overnight in very hot or freezing weather.
- Drive carefully over bumps and potholes, especially if you’re transporting items yourself.
Unloading Priority
- Bring in “Home Office – Open First” and your PC boxes as soon as possible.
- Set office furniture into its approximate final positions before assembling electronics.
- Avoid stacking heavy boxes on top of any labeled “Fragile” or “Electronics”.
Step 12: Setting Up Your New Home Office Efficiently
Once you’re in your new space, the goal is to get functional quickly, then refine the setup over time.
Position Furniture First
- Place your desk where you have easy access to outlets and, ideally, natural light.
- Ensure your chair has enough room for proper posture and movement.
- Consider future cable management when placing furniture (e.g., near wall outlets, not blocking vents).
Rebuild Networking and Internet First
- Set up modem and router where your internet connection enters the home.
- Use your reference photos to quickly reconnect everything.
- Test Wi-Fi coverage and adjust router or mesh nodes as needed.
Reconnect the PC and Monitors
- Place your PC in a ventilated area with enough airflow.
- Reconnect the GPU or internal components if you removed them.
- Install monitors on stands or arms and connect cables according to your labels and reference photos.
- Plug into a surge protector or UPS, not directly into the wall.
Boot and Test Everything
- Turn on the PC and confirm it boots normally.
- Test each monitor, keyboard, mouse, speakers, microphone, and webcam.
- Check that external drives and backup devices are recognized.
- Verify internet connectivity and speed.
Step 13: Post-Move Cable Management and Optimization
Once you’re up and running, take an extra hour to make your new setup cleaner and more efficient than the old one.
Organize Cables Properly
- Use cable clips, Velcro ties, and under-desk trays to keep cords off the floor.
- Label both ends of important cables for easy troubleshooting later.
- Bundle cables by function (e.g., monitor bundle, audio bundle, network bundle).
Fine-Tune Ergonomics
- Set monitor height so the top of the screen is at or slightly below eye level.
- Position the keyboard and mouse so your wrists are neutral and elbows at about 90 degrees.
- Ensure your chair supports your lower back and your feet rest flat on the floor or a footrest.
Reassess Your Workflow
- Arrange frequently used items (notebooks, pens, external drives) within easy reach.
- Keep the desktop surface as clutter-free as possible.
- Create a dedicated drawer or organizer for spare cables and adapters.
Step 14: When to Bring in Professional Movers for Your Home Office
Some home offices and PC setups are simple. Others are complex, high-value, or business-critical. In those cases, professional movers are well worth the investment.
Situations Where Pros Can Help the Most
- You run a business from home and can’t afford downtime.
- You have multiple monitors, servers, or specialized equipment.
- Your desk or furniture is large, heavy, or requires disassembly.
- You’re moving long-distance and want extra protection and insurance.
What Professional Movers Can Do for a PC/Home Office Move
- Provide the right packing materials and techniques for electronics.
- Safely disassemble and wrap furniture.
- Assist with loading and unloading in the correct order.
- Offer temporary storage if move-in dates don’t line up perfectly.
Partnering with a reliable company like United Local Movers ensures your home office and PC setup are handled with the same care you’d give them yourself—so you can focus on your work instead of worrying about damage, delays, or lost parts.
Home Office Move Checklist (Quick Reference)
Use this quick checklist to make sure you haven’t missed any key steps.
| Before Packing | Packing & Moving | After Arrival |
|---|---|---|
|
|
|
With the right preparation, packing techniques, and a thoughtful setup strategy, you can move your home office and PC setup with minimal risk and downtime—and even end up with a workspace that’s more organized and comfortable than before.


