
Moving is stressful enough without the extra chaos of cleaning. But a thorough clean — both before moving out and before settling in — is one of the smartest steps you can take. It helps protect your security deposit, leaves a good impression, and ensures you’re starting fresh in your new home.
Whether you’re a tenant, landlord, or homeowner, this comprehensive move-out and move-in cleaning checklist covers everything you need to clean, room by room, to make the process smooth and stress-free.
Why Deep Cleaning Before and After a Move Matters
Moving involves a lot of dirt, dust, and forgotten corners. Deep cleaning isn’t just cosmetic — it has real benefits:
- 🧹 Helps you get your security deposit back
- 🏡 Creates a healthy environment for the next residents
- 🧼 Prevents disputes with landlords or buyers
- ✨ Makes your new space feel truly yours
A detailed cleaning checklist can help you stay organized and efficient — especially during the hectic days around moving.

Step 1: Gather Your Cleaning Supplies
Before you begin, make sure you have everything on hand. A well-prepared cleaning kit can save hours of back-and-forth.
- 🧼 All-purpose cleaner
- 🪣 Mop and bucket
- 🧽 Sponges and microfiber cloths
- 🧹 Broom and vacuum
- 🧽 Glass cleaner
- 🧤 Rubber gloves
- 🪛 Scrub brush and grout cleaner
- 🧴 Disinfectant spray
If you’re moving out of a rental, check your lease — some landlords require professional cleaning for carpets or appliances.
Step 2: Create a Room-by-Room Strategy
Working systematically saves time. Start from the top (ceilings, shelves) and work your way down (floors). Also, clean empty rooms first so you’re not tripping over boxes.
Typical order:
- Bedrooms
- Living room
- Kitchen
- Bathrooms
- Entryway and common areas
Finishing floors last ensures you don’t undo your work as you move through the house.
Step 3: Bedroom Cleaning Checklist
Bedrooms tend to collect dust, hair, and hidden dirt. Key areas to clean include:
- 🧹 Dust baseboards, windowsills, and light fixtures
- 🪟 Wipe blinds, windows, and closet shelves
- 🛏️ Clean under and behind furniture if still in the room
- 🧼 Vacuum or mop floors thoroughly
- 🧽 Wipe doors, handles, and light switches
Tip: Use a damp microfiber cloth to catch fine dust that escapes dry wiping.
Step 4: Living Room and Common Area Cleaning
Living spaces accumulate fingerprints, smudges, and plenty of floor traffic. Don’t forget to:
- 🧼 Wipe down walls and corners
- 🪟 Clean window glass inside and out
- 🪑 Dust furniture, vents, and shelves
- 🧹 Vacuum carpets or mop hard flooring
- 💡 Check light bulbs and fixtures for dust or burnt bulbs
If the unit includes built-in shelving or a fireplace, clean these carefully to avoid landlord deductions.
Step 5: Kitchen Deep Cleaning Checklist
The kitchen often takes the longest. Food spills, grease, and odors build up over time. A proper kitchen clean should include:
- 🧽 Wiping cabinets inside and out
- 🫧 Scrubbing the sink and faucet
- 🧊 Cleaning inside the refrigerator and freezer
- 🔥 Degreasing the oven, stovetop, and range hood
- 🪣 Mopping the floor and disinfecting surfaces
- 🚮 Emptying and cleaning trash bins
Don’t forget often-missed areas like behind appliances, inside drawers, and under the sink.
Step 6: Bathroom Cleaning Checklist
Bathrooms need both deep cleaning and disinfection. Focus on:
- 🚿 Scrubbing showers, tubs, and tile grout
- 🪞 Cleaning mirrors and glass
- 🚽 Disinfecting toilets, sinks, and faucets
- 🧽 Wiping cabinet interiors
- 🧼 Mopping floors and baseboards
- 🧻 Replacing toilet paper holder or accessories if required
A fresh-smelling bathroom leaves a lasting positive impression on landlords or buyers.
Step 7: Entryway, Hallways, and Closets
These areas are easy to overlook but create a strong first impression. Be sure to:
- 🧹 Sweep and mop floors
- 🚪 Wipe doors and knobs
- 🧼 Dust shelves, coat racks, and light switches
- 🪟 Clean any windows or mirrors
If you have built-in storage, vacuum and wipe it out completely.
Step 8: Exterior and Balcony Spaces (if applicable)
For homes or apartments with outdoor spaces:
- 🪴 Sweep patios, balconies, or porches
- 🧽 Remove cobwebs and debris
- 🚪 Wipe down railings and doors
- 🧼 Clean outdoor light fixtures
Outdoor areas are often neglected but can influence inspection outcomes significantly.
Step 9: Final Touches for Move-Out Cleaning
Before the landlord walkthrough or turning over keys, do one last check:
- 🧼 Empty and disinfect all trash bins
- 📸 Take photos of the clean, empty unit
- 🧹 Do a final sweep and mop
- 🔑 Leave the space looking better than when you moved in
Landlords are far more likely to return your full security deposit if the place is spotless.
Step 10: Move-In Cleaning Tips
Even if the previous tenant cleaned, it’s smart to give your new place a fresh start. For move-in:
- 🧽 Disinfect high-touch surfaces
- 🧼 Clean cabinets before unpacking
- 🧹 Vacuum floors and wipe baseboards
- 🚿 Sanitize bathrooms and kitchen thoroughly
- 🌿 Air out rooms for freshness
This ensures your new home is not just clean but truly yours.
Step 11: Consider Professional Cleaning Services
If time is short or your lease requires it, hiring a professional cleaning crew can be worth it. Many companies offer move-out packages that include:
- 🧹 Full top-to-bottom cleaning
- 🧼 Carpet shampooing
- 🧽 Appliance deep cleaning
- 🧾 Detailed receipts for landlord verification
Professional cleaning can reduce stress and guarantee you meet inspection standards.
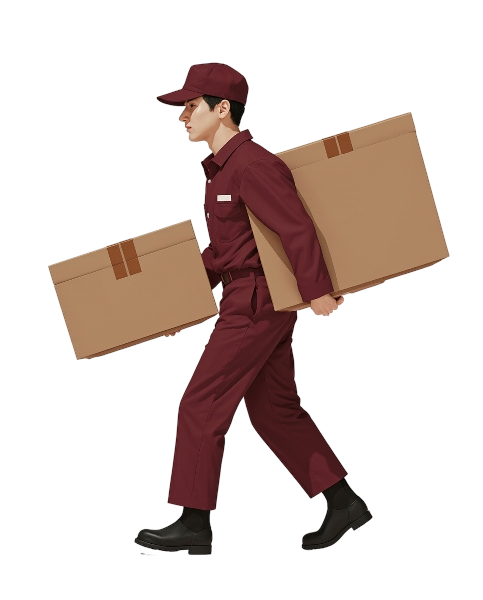
Working With a Professional Moving Company
Coordinating cleaning and moving can be overwhelming. United Local Movers can help make the process easier by handling the relocation side while you focus on leaving your old home spotless and making your new one shine.
Starting and Ending Clean
Cleaning isn’t just a chore — it’s part of a smart moving strategy. A clean home protects your deposit, smooths inspections, and helps you start your new chapter in a space that feels fresh and ready. Whether you do it yourself or hire help, having a solid cleaning checklist makes the difference.
With United Local Movers, your relocation becomes safer, faster, and stress-free — from the last scrub to the first unpacked box.


